kubota 3 cylinder diesel injection pump manual
Kubota 3 Cylinder Diesel Injection Pump Manual: A Comprehensive Guide
This manual details the intricacies of Kubota’s 3-cylinder diesel injection systems, offering guidance for troubleshooting, repair, and preventative maintenance procedures.
It’s a resource for both experienced mechanics and those tackling repairs independently, ensuring optimal engine performance and longevity.
Understanding the Kubota 3 Cylinder Diesel Engine
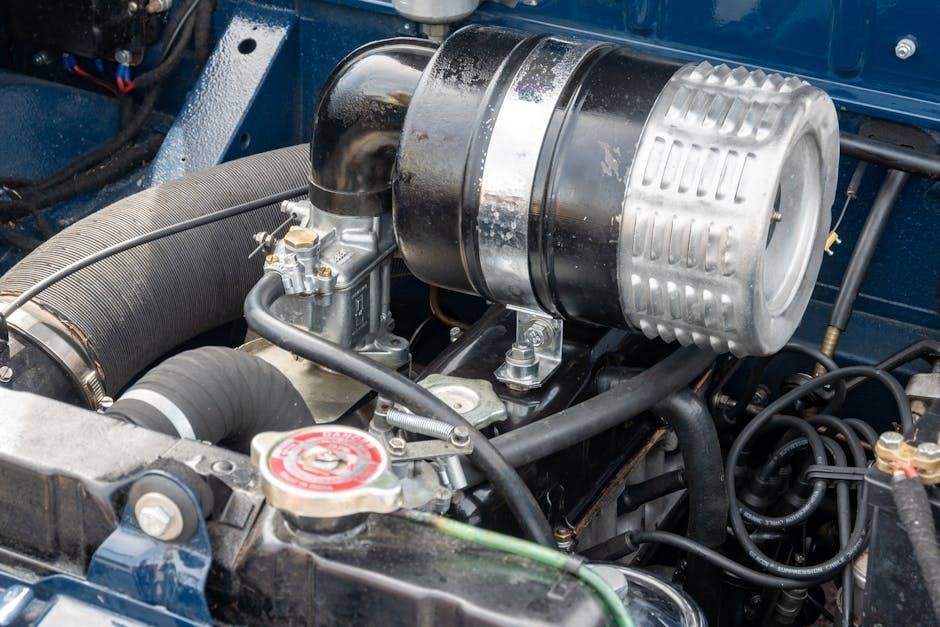
Kubota’s 3-cylinder diesel engines, like the V1205B and D722 commonly found in Multiquip welders and other equipment, are renowned for their reliability and fuel efficiency. These engines utilize a diesel injection pump to deliver precise amounts of fuel into the cylinders for combustion. Understanding the engine’s basic operation is crucial before diving into injection pump diagnostics.
The engine’s power stroke relies on the high-pressure fuel spray atomizing within the combustion chamber. The injection pump, driven by the engine, is responsible for generating this pressure and timing the fuel delivery. Proper fuel atomization and timing are essential for efficient combustion, power output, and minimizing emissions. Issues with the injection pump directly impact engine performance, causing starting difficulties, rough running, or complete engine failure. Familiarity with the engine’s layout and the injection pump’s role within the system is paramount for successful troubleshooting and repair.
Identifying Your Specific Pump Model
Accurate identification of your Kubota 3-cylinder injection pump is the first step towards successful repair or component sourcing. Kubota utilizes a unique Jem Reference and serial number system, ensuring total traceability of each build. This system is vital for ordering the correct replacement parts and accessing specific service information.
Locate the pump’s identification plate, typically affixed to the pump body. Record the model number, serial number, and any other identifying marks. These numbers are crucial when contacting service providers like Diesels Fuel Injection or ordering parts. Knowing the exact pump model allows for precise diagnosis and ensures compatibility of replacement components. Without this information, you risk ordering incorrect parts, leading to further complications and delays. Maintaining a record of this information alongside your engine details is highly recommended for future reference.
Common Issues with Kubota 3 Cylinder Injection Pumps
Kubota 3-cylinder diesel injection pumps, while robust, are susceptible to specific issues over time. A frequently reported problem involves fuel aeration, often manifesting as engine stalling after running for a short period, particularly when the fuel level drops below half a tank. This suggests a potential leak or crack in the fuel pickup tube within the tank.
Small leaks within the pump itself are also common, sometimes leading owners to believe self-repair is impossible or strongly discouraged. Air leaks in the fuel system can cause similar symptoms, disrupting the consistent fuel delivery needed for combustion. Injector issues, such as clogged nozzles or incorrect pressure settings, are also prevalent. Addressing these problems promptly is crucial to prevent further engine damage and maintain optimal performance. Regular inspection and preventative maintenance can significantly reduce the likelihood of these issues arising.
Fuel Tank and Pickup Tube Inspection
A thorough inspection of the fuel tank and pickup tube is a critical first step in diagnosing fuel-related issues. Begin by visually examining the fuel tank for any signs of corrosion or damage. Crucially, focus on the fuel pickup tube, as it’s prone to developing pinhole leaks or cracks, especially with prolonged use.
These leaks often become apparent when the fuel level drops below half a tank, causing fuel aeration and subsequent engine stalling. The pickup tube is typically removable from the top of the tank along with the fuel pickup line, allowing for easy inspection. Look closely for any visible damage or fuel residue around the tube’s connections. Replacing a damaged pickup tube is a relatively straightforward repair that can often resolve intermittent engine problems and ensure a consistent fuel supply.
Diagnosing Fuel Aeration Problems
Fuel aeration, the presence of air bubbles in the fuel supply, is a common culprit behind intermittent engine stalling and poor performance. This issue frequently manifests when the fuel level is low, suggesting a problem with the fuel pickup tube within the tank. Inspect the tube for pinhole leaks or cracks, as these allow air to enter the system as the fuel level decreases.
Symptoms include the engine running briefly before dying, particularly after refueling or during operation with a partially depleted tank. Carefully examine the fuel lines for any signs of air bubbles while the engine is running (if possible). Addressing fuel aeration is vital, as it can lead to inconsistent fuel delivery and potential damage to the injection pump. A simple pickup tube replacement often resolves this issue effectively.
Initial Troubleshooting Steps
Before diving into complex repairs, begin with fundamental checks. A common symptom is an engine that starts briefly then dies, often seen in Kubota V1205B engines. First, verify adequate fuel supply – ensure the tank isn’t empty and the fuel shut-off valve (if equipped) is open. Next, inspect the fuel filter for blockage, replacing it if necessary.
Attempt to manually prime the fuel system, if your pump has a priming lever. Observe for any visible fuel leaks around the injection pump and fuel lines. A small leak can introduce air, causing operational issues. If the problem persists, proceed to systematically check for air leaks within the entire fuel system, starting from the tank and moving towards the injection pump.
Checking for Air Leaks in the Fuel System
Air intrusion is a primary culprit behind Kubota injection pump issues; Begin by visually inspecting all fuel lines, connections, and fittings for cracks, looseness, or damage. Tighten any loose connections, but avoid over-tightening. A common area for leaks is the fuel pickup tube inside the tank, particularly if the problem occurs when the fuel level is below half-full; inspect for pinhole leaks or cracks.
With the engine running (if possible) or attempting to start, carefully listen for a hissing sound, which indicates escaping air. You can also use a soapy water solution sprayed onto suspected leak points – bubbles will form where air is present. Pay close attention to the fuel filter housing and the injection pump itself. Remember, even a small air leak can disrupt fuel delivery and cause starting or running problems.
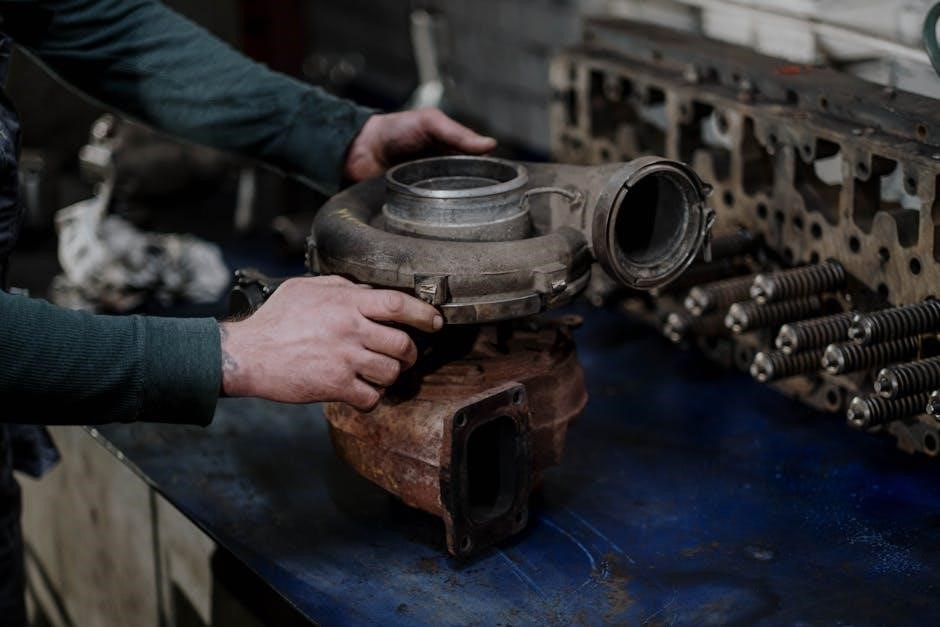
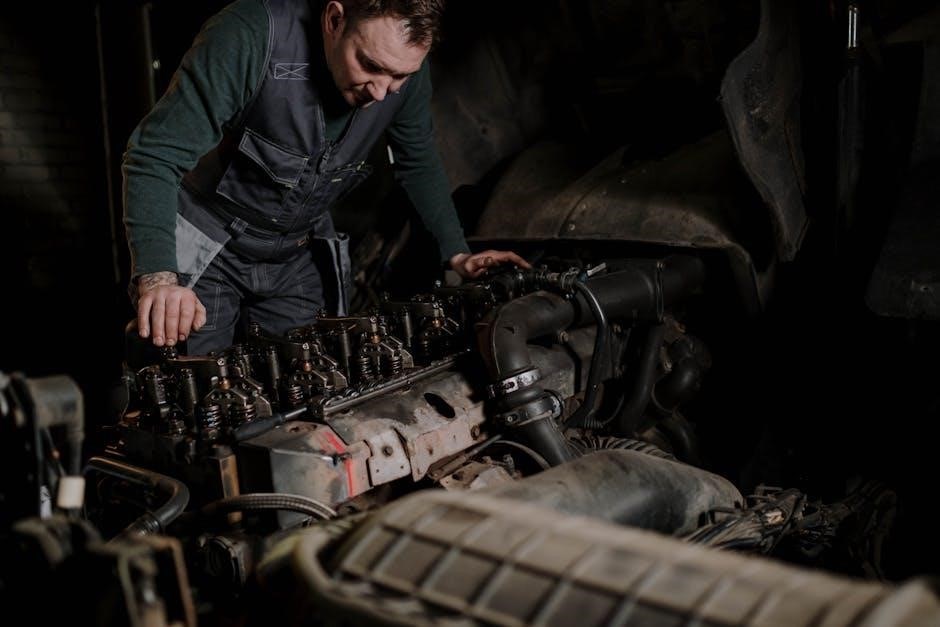
Disassembly of the Injection Pump
Prior to disassembly, meticulously document the pump’s original configuration with photographs and notes. Carefully remove the governor linkage, paying particular attention to the governor fork alignment with the rack pin. This alignment is crucial; failure to maintain it can lead to damage during reassembly. Utilize the stop lever control to properly align the slot in the governor fork with the rack pin before proceeding.
Systematically remove the pump’s components, labeling each part clearly. Loosen and remove the retaining bolts, then gently separate the sections. Be mindful of small parts like shims and springs, as they are easily lost. A clean workspace is essential to prevent contamination. Remember to discharge any remaining fuel before beginning the disassembly process for safety.
Governor Fork Alignment and Rack Pin
Precise alignment of the governor fork and rack pin is paramount during both disassembly and reassembly. Utilizing the stop lever control facilitates this process, ensuring the slot in the governor fork correctly engages with the rack pin on the fuel pump. Incorrect alignment will inevitably result in damage to the delicate governor fork mechanism, potentially rendering the injection pump inoperable.
Before separating the pump components, carefully observe and record the existing alignment. During reassembly, slowly and deliberately maneuver the governor fork until the slot perfectly aligns with the rack pin. A smooth, effortless fit indicates correct positioning. Avoid forcing the components, as this could cause bending or breakage. This step is critical for maintaining proper engine speed regulation.
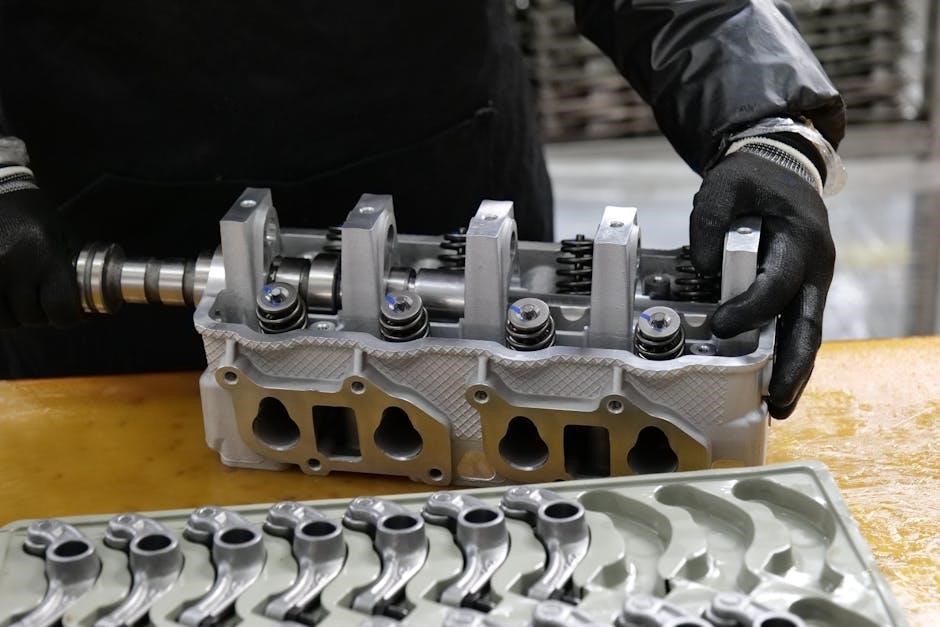
Injector Nozzle Inspection and Replacement
Thorough inspection of the injector nozzles is a crucial step in any Kubota diesel injection pump overhaul. Each injector should be meticulously examined for wear, damage, or carbon buildup, as these imperfections directly impact fuel atomization and combustion efficiency. Replacing the nozzles is often recommended as a standard practice during a rebuild, ensuring optimal performance and reliability.
When installing new nozzles, adherence to manufacturer specifications is non-negotiable. Each injector is fitted with a new nozzle and the pressure is carefully set to these specifications using specialized testing equipment. Incorrect pressure settings can lead to poor engine running, increased emissions, and potential engine damage. Precise calibration guarantees proper fuel delivery and maximizes engine power and fuel economy.
Setting Injector Pressure to Manufacturer Specifications
Achieving accurate injector pressure is paramount for optimal Kubota diesel engine performance. Deviations from the factory settings can manifest as starting difficulties, rough idling, reduced power output, and increased exhaust emissions. Specialized testing equipment is essential for this process, allowing precise measurement and adjustment of opening and closing pressures.
The procedure involves securely mounting the injector in a testing apparatus and gradually increasing fuel pressure until the nozzle begins to spray. The pressure at which the spray initiates is carefully recorded and compared to the manufacturer’s specified value. Adjustments are made using calibrated shims or screws, ensuring the pressure falls within the acceptable range. Repeat this process for each injector, guaranteeing consistent fuel delivery across all cylinders.
Injection Pump Component Cleaning
Thorough cleaning of injection pump components is crucial during a rebuild, removing accumulated deposits, rust, and debris that can impede precise operation. Disassembled parts, including the plunger, barrel, delivery valve, and governor components, should be immersed in a dedicated diesel fuel injection cleaner. Avoid using abrasive cleaners or brushes that could damage finely machined surfaces.
After soaking, each component must be meticulously inspected for wear or damage. Utilize compressed air to blow out all passages and orifices, ensuring unrestricted fuel flow. Special attention should be given to the plunger and barrel, as even microscopic imperfections can significantly affect pump output. A clean, lint-free cloth should be used to wipe down all parts before reassembly, preventing contamination and ensuring a smooth, reliable rebuild.
Reassembly Procedures
Careful and precise reassembly is paramount for a successful injection pump rebuild. Begin by lubricating all moving parts with clean diesel fuel to minimize friction and ensure proper seating. Install the plunger and barrel assembly, paying close attention to orientation marks. Reassemble the delivery valve, ensuring it seats correctly to prevent fuel leakage.
The governor components require particular attention; the governor fork must be aligned with the rack pin to avoid damage during operation. This alignment can be facilitated using the stop lever control. Secure all fasteners to the manufacturer’s specified torque values. Before final assembly, double-check that all components are correctly positioned and free from debris, guaranteeing optimal performance and longevity of the rebuilt pump.
Ensuring Proper Timing During Reassembly
Precise timing is critical for optimal Kubota diesel engine performance. During reassembly, meticulously align the injection pump’s timing marks with those on the engine flywheel or crankshaft pulley. Incorrect timing can lead to reduced power, increased fuel consumption, and even engine damage. Verify the timing chain or belt is correctly tensioned and that all gears are properly meshed.
After initial alignment, rotate the engine by hand several times, rechecking the timing marks to confirm accuracy. A slight adjustment may be necessary to achieve perfect synchronization. Remember, the Jem Reference and serial number system aids in traceability, ensuring correct component placement. Confirm the governor linkage moves freely and doesn’t interfere with the timing process, guaranteeing a smooth and efficient engine operation.

Testing the Rebuilt Injection Pump
Post-rebuild, rigorous testing is paramount to validate the injection pump’s functionality. Begin with a static test, verifying the pump’s ability to deliver fuel at the correct pressure and volume for each cylinder. Utilize specialized testing equipment to simulate engine load and assess performance across the RPM range. Each injector should be fitted with a new nozzle and meticulously set to the manufacturer’s specifications.
Subsequently, perform a dynamic test by installing the pump on a test engine or the original Kubota engine. Monitor engine performance for smooth operation, proper fuel atomization, and absence of smoke or unusual noises. Confirm the governor responds correctly to load changes. Thorough testing ensures the rebuilt pump meets Kubota’s stringent quality standards, guaranteeing reliable operation and preventing future issues.
Traceability and Serial Numbers (Jem Reference System)
Maintaining meticulous records is crucial when rebuilding Kubota injection pumps. A robust traceability system, like the “Jem Reference System,” ensures complete documentation of each component and process involved in the rebuild. This system utilizes unique serial numbers assigned to each pump and its individual parts, allowing for a detailed history to be tracked.
This comprehensive record-keeping facilitates identifying the origin of components, the technician who performed the work, and the specific tests conducted. Our unique Jem Reference and serial number system ensures total traceability of each build. This level of detail is invaluable for quality control, warranty claims, and future troubleshooting. It provides confidence in the rebuild’s integrity and supports long-term reliability.

Professional Rebuild Services
While DIY repairs are possible, Kubota injection pump rebuilds often demand specialized knowledge, tools, and testing equipment. Diesels Fuel Injection is a highly recommended service provider specializing in diesel fuel injection systems, offering expert rebuilds for Kubota pumps and injectors. They are known for competitive pricing and excellent customer service, serving clients nationwide.
They rebuilt my injectors and had 2 friends have the injector pumps done by them; they do great work. When needing an IP for a 4-cylinder Kubota, they were able to order it with prepayment, costing $1100. Here is a good source for injection pumps, injectors and other services. Entrusting your pump to professionals ensures a precise rebuild, adhering to manufacturer specifications and maximizing performance and longevity.
Diesels Fuel Injection ー A Recommended Service Provider
Diesels Fuel Injection stands out as a premier choice for Kubota diesel injection pump and injector services. Located locally but serving customers across the US, they’ve earned a reputation for quality workmanship and responsive support. Numerous testimonials highlight their expertise, with users reporting successful rebuilds of both injectors and complete injection pumps.
They are very competitive with prices and have excellent service. Their unique Jem Reference and serial number system guarantees complete traceability throughout the rebuild process, ensuring accountability and quality control. This company is highly recommended for anyone seeking reliable and professional diesel fuel injection solutions for their Kubota engine, offering a cost-effective alternative to replacement.
Preventative Maintenance for Longevity

Regular preventative maintenance is crucial for extending the life of your Kubota 3-cylinder diesel injection pump and overall engine health. Prioritize consistent fuel filter replacements to prevent contaminants from reaching sensitive pump components, safeguarding against premature wear and potential failures. Inspect the fuel tank and pickup tube regularly for signs of corrosion or damage, addressing any issues promptly to avoid fuel aeration problems.
Pay close attention to air leaks within the fuel system, as these can introduce air into the fuel flow, leading to erratic engine performance. Ensure proper injector nozzle function by periodically checking spray patterns and replacing nozzles as needed. Adhering to a strict maintenance schedule will minimize downtime and maximize the reliability of your Kubota diesel engine.
Related Posts

liftmaster 880lmw manual
Need help with your LiftMaster 880LMW? Download the easy-to-follow manual here! Troubleshooting, programming & safety tips – we’ve got you covered. Get back to opening & closing!

eclipse 5 oxygen concentrator manual
Need an Eclipse 5 Oxygen Concentrator manual? Find it & troubleshoot easily! Download the PDF or view online. Breathe easy with Allegheny Software.

panasonic kx-dt343 phone manual
Lost your Panasonic KX-DT343 phone manual? Find a free, easy-to-use guide right here! Get back to making calls with our helpful resources. **KX-DT343** made simple.