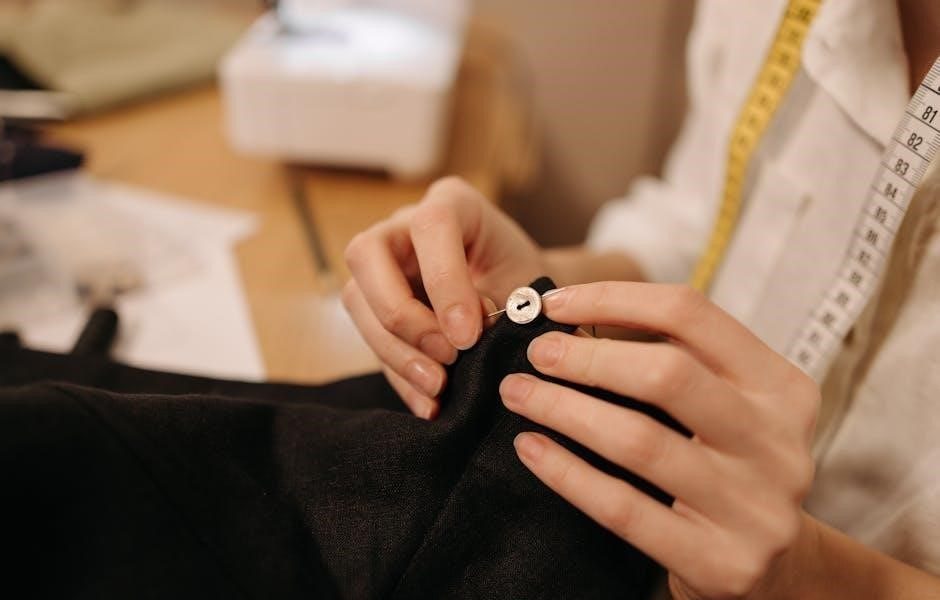
babylock repair manual
Babylock Repair Manual: A Comprehensive Guide (Updated 12/04/2025)
This manual details Babylock machine repair, offering innovative features and functionalities for users. Review crucial information for optimal performance and longevity, as of today’s date.
Babylock sewing machines represent a pinnacle of engineering and innovation within the home and industrial sewing world. Known for their precision, durability, and advanced features, these machines require specialized knowledge for effective repair and maintenance. This section introduces the core principles behind Babylock’s design, highlighting the unique technologies – like Jet Air threading and Wave-Motion feeding – that set them apart.
Understanding these intricacies is crucial for anyone undertaking repairs. Proper diagnosis and repair techniques ensure continued optimal performance and extend the lifespan of your valuable Babylock investment. This guide will empower you with the knowledge to confidently address common issues.
II. Understanding Babylock Models
Babylock offers a diverse range of sewing machines, each tailored to specific needs and skill levels. From robust industrial overlocks to versatile home sewing machines, recognizing model-specific characteristics is paramount for successful repair. Key distinctions lie in their threading systems, stitch capabilities, and overall mechanical complexity;
This section provides an overview of the major Babylock categories: single needle, overlock/serger, and coverstitch machines. Understanding these differences allows for targeted troubleshooting and ensures the correct repair procedures are applied. Familiarity with model numbers and their corresponding features is essential for sourcing the right parts and diagrams.
III.A. Babylock Single Needle Machines ⏤ Common Issues
Babylock single needle machines, while reliable, can exhibit recurring problems. Frequent issues include tension inconsistencies leading to looping or puckering, broken needles due to incorrect threading or fabric selection, and bobbin winding/feeding malfunctions; Timing discrepancies can also cause skipped stitches or uneven seam formation.
Furthermore, motor noise or erratic speed can indicate internal wear or electrical problems. Regular cleaning and lubrication are crucial preventative measures. Diagnosing these issues often requires careful observation of the stitching process and a systematic check of mechanical components. Proper troubleshooting minimizes costly repairs.
III.B. Babylock Overlock/Serger Machines ⏤ Common Issues
Babylock overlock/serger machines, known for their complexity, present unique repair challenges. Common problems include differential feed imbalances causing fabric distortion, looper timing issues resulting in skipped stitches or uneven edges, and blade dullness affecting fabric trimming. Thread breakage is frequent, often stemming from incorrect threading or tension settings.
Knife drive belt slippage leads to inconsistent cutting, while motor issues can cause erratic operation. Regular cleaning of lint buildup is vital. Accurate diagnosis requires understanding the interplay between loopers, needles, and feed dogs. Preventative maintenance extends machine life and ensures optimal performance.

III.C. Babylock Coverstitch Machines ― Common Issues
Babylock coverstitch machines excel at creating professional hems, but are prone to specific issues. Chain stitch defects, like loose or broken chains, are frequent, often caused by looper timing discrepancies or incorrect tension. Looper thread breakage is common, especially with delicate fabrics. Needle threading difficulties and inconsistent stitch formation also present challenges.
Problems with the differential feed can lead to wavy or stretched seams. Regular cleaning is crucial to prevent lint buildup affecting stitch quality. Proper looper adjustment is vital for consistent coverstitch creation. Understanding the machine’s mechanics is key to effective repair and maintenance.
IV. Essential Tools for Babylock Repair
Successful Babylock repair demands a specialized toolkit beyond basic sewing supplies. A comprehensive screwdriver set, including miniature sizes, is paramount for accessing internal components. High-quality pliers and cutters are needed for thread trimming and component manipulation. Specialized Babylock tools, like looper drivers and precise tweezers, are indispensable for delicate adjustments.
A seam ripper is crucial for disassembly, and a magnifying glass aids in inspecting small parts. Digital multimeters are essential for testing electrical components. Proper lighting is vital for clear visibility during intricate repairs. Investing in these tools ensures efficient and accurate maintenance.

V.A. Screwdriver Sets (Specific Types Needed)
Babylock repair necessitates a diverse screwdriver set, far exceeding standard household kits. Precision screwdrivers are crucial, including sizes #000, #00, #0, and #1 Phillips head, alongside flathead equivalents. Japanese Industrial Standard (JIS) screwdrivers are often required, as Babylock utilizes these screws extensively. A set with magnetic tips prevents dropped screws within the machine’s intricate mechanisms.
Torx screwdrivers (T5-T15) are also frequently needed for certain models. Avoid using worn or damaged screwdrivers, as they can strip screw heads, complicating repairs. Investing in a high-quality set ensures proper fit and prevents damage.
V.B. Pliers and Cutters
For effective Babylock repair, several specialized pliers and cutters are essential. Needle-nose pliers, both straight and curved, facilitate handling small parts within tight spaces. Flush cutters are vital for cleanly trimming threads and looper blades, preventing fraying and ensuring smooth operation. Chain-nose pliers assist with looper manipulation and adjustments.
Diagonal cutting pliers are useful for wire cutting, if needed. Avoid using pliers with damaged or worn jaws, as they can mar surfaces. Investing in quality tools minimizes damage and improves repair precision.
V.C. Specialized Babylock Tools (Looper Drivers, etc.)
Babylock machines often require unique tools for intricate repairs. Looper drivers are indispensable for safely removing and installing loopers without causing damage. Specialized screwdrivers with unique head sizes are crucial for accessing internal components. A Babylock presser foot lifter tool aids in precise adjustments.
Timing paper helps verify proper looper synchronization. Consider a looper blade alignment tool for optimal cutting performance. Investing in these specific tools streamlines repairs and prevents accidental damage to sensitive parts, ensuring professional results.
VI. General Troubleshooting Steps
Begin by verifying the power connection and ensuring the machine is switched on. Next, re-thread the machine completely, checking for correct threading paths and tension settings. Inspect the needle and looper for damage or wear, replacing them if necessary.
Clean the machine thoroughly, removing lint and debris. Test with scrap fabric to identify stitch issues. Consult the manual for error codes if displayed. Document each step taken during troubleshooting for efficient problem-solving and future reference.
VII.A. Power Supply Issues & Solutions
First, confirm the power cord is securely connected to both the machine and a working outlet. Test the outlet with another device to rule out outlet failure. Check the machine’s power switch for proper function; a replacement may be needed if faulty. Inspect the internal fuse – always disconnect power before checking – and replace if blown with the correct amperage.
If issues persist, a professional repair may be necessary, as internal power supply components require specialized knowledge. Avoid attempting repairs beyond basic checks to prevent further damage or electrical hazards.
VII.B. Threading Problems ⏤ A Detailed Guide
Incorrect threading is a frequent cause of Babylock issues. Always refer to your machine’s specific threading diagram – never guess! Ensure thread is properly seated in the tension discs and guides. Check for lint or debris obstructing the thread path; use a small brush or compressed air. Verify the thread spool is rotating freely and isn’t binding.
Use the correct thread type and weight recommended for your fabric. Re-thread the entire machine, even if only one thread seems problematic. A slow, deliberate approach minimizes errors.
VII.C. Stitch Quality Issues ⏤ Diagnosis & Fixes
Poor stitch quality often stems from tension imbalances, dull blades, or incorrect needle selection. Begin by re-threading the machine and checking the tension settings – small adjustments can make a big difference. Inspect the needle for damage or wear; replace if necessary. Ensure the looper blades are sharp and aligned correctly.

Test stitch on scrap fabric before starting your project. Consider fabric type and weight when choosing needle and thread. If problems persist, consult the troubleshooting section for specific error patterns.
VIII. Repairing Common Babylock Problems
Addressing Babylock issues requires a systematic approach. Start with simple fixes like re-threading and cleaning lint buildup. Common problems include tension issues, skipped stitches, and broken threads. Regularly inspect and replace needles and looper blades to maintain optimal performance. Always disconnect the power before attempting any internal repairs.
Refer to model-specific diagrams for component locations. Proper lubrication is crucial; use recommended Babylock oils. If unsure, seek assistance from a qualified technician to avoid further damage.
IX.A. Fixing Tension Issues (Upper & Lower Looper)

Tension problems are frequent in Babylock machines, causing looping or puckering. Begin by re-threading both the upper and lower loopers, ensuring correct path and sufficient thread engagement. Adjust tension dials incrementally, testing after each change with scrap fabric. Clean tension discs with a soft brush to remove lint and debris.
Check for damaged or worn tension springs. Incorrect thread type can also affect tension; use recommended Babylock threads. Consult your model’s manual for specific tension settings.
IX.B. Replacing Needles & Looper Blades
Dull or damaged needles and looper blades significantly impact stitch quality. Always use genuine Babylock needles and blades, matched to your fabric type. Power off the machine before attempting replacement. Needles are typically secured with a screw; loosen and replace carefully. Looper blades require specialized tools – a looper driver – for safe removal and installation.
Ensure blades are correctly aligned to prevent skipped stitches or fabric damage. Dispose of old blades safely; they are extremely sharp. Refer to your machine’s manual for specific instructions.
IX.C. Addressing Skipped Stitches
Skipped stitches are a common Babylock issue, often stemming from incorrect threading, dull needles, or improperly installed looper blades. First, re-thread the machine meticulously, ensuring thread paths are clear. Inspect the needle for damage and replace if necessary. Verify looper blade alignment and sharpness.
Check the presser foot pressure; insufficient pressure can cause skipped stitches. Adjust tension settings, starting with the upper looper. If problems persist, consult the troubleshooting section of your manual or seek professional assistance.

X. Babylock Overlock/Serger Specific Repairs
Babylock overlock/serger machines require specialized repair knowledge due to their complex mechanisms. Common issues include looper timing problems, differential feed malfunctions, and knife drive belt failures. Regular cleaning is crucial to prevent lint buildup affecting performance. Looper replacement demands precision; incorrect installation leads to stitch irregularities.
Differential feed adjustments impact fabric handling, requiring careful calibration. Replacing the knife drive belt restores cutting functionality. Always consult the specific model’s repair manual for detailed instructions and diagrams before attempting any repairs.
XI.A. Looper Replacement Procedures
Looper replacement on Babylock sergers requires meticulous attention to detail. Begin by disassembling the looper area, carefully noting the position of all components. Remove the old looper, inspecting for any damage to surrounding parts. Install the new looper, ensuring correct orientation and secure seating.
Timing is critical; align the looper with the needles according to the machine’s manual. Test the machine with scrap fabric to verify proper stitch formation. Incorrect looper installation results in skipped stitches or uneven edges. Refer to model-specific diagrams for precise guidance.
XI.B. Differential Feed Adjustment & Repair
Babylock’s differential feed is crucial for preventing fabric puckering or stretching. Adjustment involves loosening the dial securing the feed dogs, then altering the ratio. A higher ratio gathers fabric, while a lower ratio stretches it. Inspect the feed dogs for wear or damage; replace if necessary.
Repair often involves cleaning accumulated lint and thread from the feed mechanism. Ensure smooth movement of both upper and lower feed dogs. Incorrect adjustment leads to uneven seams. Consult your model’s manual for specific dial settings and troubleshooting steps.
XI.C. Knife Drive Belt Replacement
The knife drive belt powers the cutting blades on your Babylock overlock/serger. A broken or worn belt prevents fabric trimming. Replacement requires accessing the lower blade housing, often involving removing a cover plate. Carefully note the belt’s routing before removal – diagrams are helpful!
Install the new belt, ensuring it’s properly seated on both the motor pulley and the knife shaft. Check belt tension; it should be snug but not overly tight. Test the knife function before reassembling the machine. Always disconnect power before performing this repair.
XII. Babylock Coverstitch Specific Repairs
Babylock coverstitch machines create professional hems and decorative stitching. Repairs often center around looper timing and chain stitch consistency. Incorrect looper timing causes skipped stitches or uneven coverage. Adjustments require specialized tools and a thorough understanding of the machine’s mechanics.
Chain stitch issues typically stem from improper threading or looper tension. Regular cleaning and lubrication are crucial for smooth operation. Consult the service manual for detailed diagrams and procedures before attempting complex repairs. Always prioritize safety by disconnecting power.
XIII.A. Coverstitch Looper Timing Adjustments
Precise looper timing is vital for flawless coverstitch quality. Misalignment results in skipped stitches, broken threads, or distorted seams. Adjustments involve loosening set screws on the looper mechanism and carefully rotating the looper to achieve correct synchronization with the needle.
Use a timing light or observe the looper’s movement relative to the needle’s position during operation. Small adjustments are key; overcorrection can worsen the problem. Refer to the Babylock service manual for specific timing specifications for your model. Retighten screws securely after adjustment.
XIII.B. Chain Stitch Issues & Solutions
Chain stitch problems on Babylock coverstitch machines often stem from looper tension or timing. A loose looper creates a fragile chain, while a tight looper can cause puckering. Inspect the looper case for lint buildup, which disrupts thread flow. Ensure proper threading, following the machine’s diagram meticulously.
Adjust looper tension using the designated screw, making small increments. Verify looper timing as described previously. If issues persist, check the needle and looper blades for damage. Replace worn components and re-test.
XIV. Babylock Single Needle Machine Repairs
Babylock single needle machines, while robust, require occasional repairs. Common issues include bobbin tension problems, feed dog malfunctions, and needle breakage. Begin by inspecting the bobbin case for debris or damage, ensuring smooth rotation. Check the bobbin tension and adjust as needed for balanced stitches.
If feed dogs are slipping, verify they are properly engaged and clean any accumulated lint. Address needle breakage by using the correct needle type and size for the fabric. Regular lubrication is crucial for smooth operation and preventing wear.
XV.A. Bobbin Case Adjustment & Repair
Proper bobbin case adjustment is vital for balanced stitches. Begin by ensuring the bobbin case is correctly inserted and seated within the machine. Inspect the tension spring for damage or wear, replacing if necessary. Adjust the screw on the bobbin case to fine-tune tension; clockwise increases, counterclockwise decreases.
Clean the bobbin case thoroughly, removing lint and debris that can interfere with smooth operation. If the bobbin case is bent or damaged, replacement is recommended. Always test adjustments with scrap fabric before working on a project.
XV.B. Feed Dog Issues & Replacement
Feed dogs are crucial for fabric advancement; issues cause uneven stitching. Check for obstructions like thread or lint preventing movement. Inspect the feed dog teeth for wear or damage – dull or broken teeth require replacement. Ensure proper feed dog height adjustment; too high causes puckering, too low causes skipping.
To replace feed dogs, typically loosen screws holding them in place, remove the old dogs, and install new ones, tightening securely. Always use genuine Babylock replacement parts for optimal performance. Test the machine with scrap fabric after replacement.
XVI. Lubrication and Maintenance
Regular lubrication is vital for smooth Babylock operation and longevity. Use only recommended lubricants – avoid household oils which can gum up mechanisms. Focus on high-friction areas: needles, loopers, and motor components. Apply sparingly, wiping away excess to prevent staining fabric.
Maintenance includes cleaning lint buildup with a brush and vacuum. Inspect belts for wear and replace as needed. Check for loose screws and tighten them. A consistent maintenance schedule prevents major repairs and ensures optimal stitching quality.
XVII.A. Recommended Lubricants for Babylock Machines
Babylock specifically recommends sewing machine oil, a lightweight, non-staining formula. Avoid using WD-40 or general-purpose lubricants, as they attract dust and can damage internal components. High-quality synthetic oils offer superior performance and protection, especially for high-speed machines.
For sergers, a Teflon-based lubricant is beneficial for reducing friction on looper areas. Always apply oil sparingly, using a needle applicator for precision. Regular oiling – after every 8 hours of use – maintains optimal performance and prevents wear. Refer to your machine’s manual for specific recommendations.
XVII.B. Regular Maintenance Schedule
Daily: Remove lint and dust with a brush after each use. Weekly: Oil all lubrication points as indicated in your machine’s manual. Monthly: Inspect the needle and looper blades for damage, replacing if necessary. Clean the bobbin area thoroughly.
Every 6 Months: Deep clean the entire machine, including the feed dogs and tension discs. Annually: Have a qualified technician inspect and service your Babylock machine. Consistent maintenance prevents costly repairs and ensures optimal stitching quality and longevity.
XVIII. Advanced Troubleshooting ― Error Codes
Babylock machines utilize error codes to pinpoint specific malfunctions. These codes, displayed on the machine’s screen, require careful interpretation. Common codes indicate threading issues, motor problems, or sensor failures. Refer to your machine’s specific manual for a complete list and detailed explanations of each code.
Decoding these messages is crucial for effective repair. Attempting repairs without understanding the error can worsen the problem; Resetting the machine, as outlined in the manual, may clear some errors after addressing the underlying cause.
XIX.A. Decoding Babylock Error Messages
Babylock error messages are the machine’s way of communicating specific problems. These aren’t random; each code corresponds to a defined issue, ranging from simple threading errors to more complex mechanical failures. Consult your machine’s manual first – it’s the definitive guide to your model’s codes.
Common messages relate to looper timing, needle breakage, or motor overload. Understanding the code’s meaning prevents misdiagnosis and wasted effort. Online forums and Babylock’s support website can also assist in decoding unfamiliar messages, ensuring accurate troubleshooting.
XIX.B. Resetting Babylock Machines to Factory Settings
Resetting a Babylock machine returns it to its original factory configuration, often resolving software glitches or unusual behavior. However, this erases any customized settings, so document them beforehand! The procedure varies significantly between models; always refer to your specific machine’s manual for precise instructions.
Typically, it involves a specific sequence of button presses while powering on the machine. Incorrectly performing the reset can cause further issues, so caution is crucial. A factory reset is a last resort after exhausting other troubleshooting steps.
XX. Finding Babylock Parts & Diagrams
Locating replacement parts and accurate diagrams is essential for successful Babylock repairs. Official Babylock parts suppliers offer genuine components, ensuring compatibility and quality. However, these can be more expensive than aftermarket options. Online resources provide exploded views and parts lists, aiding in identification and ordering.
Always verify the part number against your machine’s model to avoid errors. Diagrams are invaluable for understanding assembly and disassembly procedures. Several websites specialize in sewing machine parts, offering a wide selection and competitive pricing;
XXI.A. Official Babylock Parts Suppliers
Babylock’s official suppliers guarantee genuine parts, ensuring perfect fit and function for your machine. These suppliers prioritize quality and offer expert assistance in identifying the correct components. Authorized dealers often maintain extensive inventories, providing quick access to frequently needed items like needles, looper blades, and belts.
While generally more expensive than third-party options, official parts minimize compatibility issues and uphold Babylock’s performance standards. Locate authorized dealers through the Babylock website using their dealer locator tool. Direct purchase options may also be available through Babylock’s online store.
XXI;B. Online Resources for Babylock Parts Diagrams
Accessing Babylock parts diagrams online streamlines the repair process, aiding in accurate identification of components. Babylock’s official website provides a searchable database of exploded views and parts lists for numerous models. Several independent websites and forums also curate these diagrams, offering user-friendly interfaces.
These resources are invaluable when ordering replacement parts, ensuring compatibility and preventing errors. YouTube tutorials frequently utilize these diagrams, visually demonstrating disassembly and repair procedures. Always verify the diagram’s accuracy by cross-referencing it with your machine’s model number.
XXII. Safety Precautions During Repair
Prioritize safety when repairing your Babylock machine. Always disconnect the power cord before commencing any work to prevent electrical shock. Wear safety glasses to protect your eyes from flying debris, especially when dealing with needles or blades. Use appropriate tools and avoid improvising, as this can lead to damage or injury.
Be mindful of sharp components like needles, loopers, and blades; handle them with care. Keep fingers clear of moving parts during testing. Properly dispose of old parts and lubricants. If unsure about any procedure, consult a qualified technician.

XXIII. Resources for Further Assistance
Need extra help with your Babylock repair? Babylock’s official website (link placeholder) provides comprehensive support, FAQs, and downloadable manuals. Explore online Babylock repair forums and communities (link placeholder) where experienced users share knowledge and troubleshooting tips. These platforms offer a valuable space to ask questions and receive guidance.
Consider contacting a certified Babylock technician for complex issues or if you’re uncomfortable performing repairs yourself. Authorized Babylock dealers can also provide assistance and genuine parts. Remember to utilize these resources for a successful repair experience.
XXIV.A. Babylock Official Website & Support
Babylock’s official website (link placeholder) is your primary resource for repair information. It features a detailed FAQ section addressing common issues, alongside downloadable user manuals and parts lists for various models. You’ll find helpful troubleshooting guides and instructional videos demonstrating repair procedures.
Direct support is available through their online contact form or by phone. The website also lists authorized Babylock dealers near you, offering professional repair services and genuine parts. Regularly check for updates and new resources added to their support section.
XXIV.B. Online Babylock Repair Forums & Communities
Numerous online forums and communities are dedicated to Babylock sewing machine repair. These platforms offer a valuable space to connect with experienced users and technicians. Share your specific issues, ask questions, and benefit from collective knowledge. Popular forums often feature detailed repair threads, diagrams, and troubleshooting tips not found elsewhere.
Active communities can provide quick solutions and alternative repair approaches. Remember to verify information and exercise caution when following advice from online sources. Websites like (forum link placeholder) are excellent starting points.

Related Posts

panasonic kx-dt343 phone manual
Lost your Panasonic KX-DT343 phone manual? Find a free, easy-to-use guide right here! Get back to making calls with our helpful resources. **KX-DT343** made simple.

mustard seed garden manual of painting
Unlock the secrets of classical Chinese painting with the ‘Mustard Seed Garden Manual’! Explore beautiful techniques & start your artistic journey today. A timeless resource.

power air fryer instruction manual
Lost your Power Air Fryer instruction manual? Find free, downloadable PDFs for all models right here! Get cooking faster & avoid frustration.